Choose a reference. Find a major label track with the tonal balance you’re looking for – ideally something that hasn’t been totally decimated in mastering, since you’ll be comparing it to your unmastered tracks. If you followed my earlier advice on using a reference during the mixing process, you’ll want to use the same track here.
2. Load in your tracks. I’m assuming that you’ve already rendered all the tracks for your release as stereo 24-bit or higher .wav or AIFF files, with no processing on the master bus, and that they peak under 0 dB. If they hit 0 dB, that means they’re clipped. Lower the gain on the master bus by 6 dB and try again. Once you’ve got clean mixdowns, fire up your DAW and put each of them and your reference on separate channels, like so:
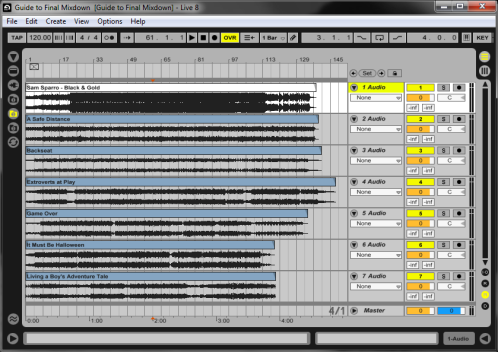 3. Trim each track down to a representative clip. We’re going to use the loudest section of each track as a stand-in for the entire mix. In most cases, this means trimming all but 15 seconds or so of the chorus. Be sure to solo each channel before you hit play so you don’t blow your ears out! In fact, turn down your reference track by 12 dB right off the bat, since it’s already mastered. You’ll end up with something like this:
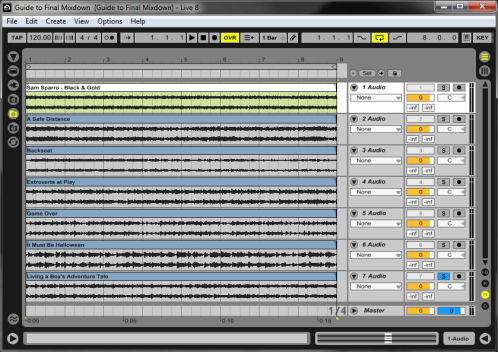 4. Match volumes. Bounce between the reference and your mixdowns, adjusting volume levels until everything matches. Be sure to make the gain adjustment at the clip level, not on the channel, so you won’t lose your settings when we…
5. Line up all the clips onto a single channel. Alternate between reference and mixdown, like so:
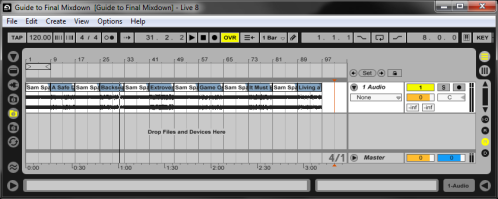 6. A/B compare your mixdowns and reference. Hit play and close your eyes. How does each mixdown sound immediately after the reference track? Bright? Dull? Muddy? Boomy? Take plenty of notes, and keep fine-tuning the volume of your clips.
7. Back to the drawing board. Use your notes to make adjustments to your mixes. Import your reference track into each of your projects if you haven’t already. If a mix is too bright, an easy fix is to lower the hi-hats. If a mix is too bassy, ensure the low end is rolled off of non-bass instruments and/or turn down the kick and bass (I detail the process here). If a mix is too muddy, look at cutting some 200-400 Hz, raising some rolloff frequencies, or thinning out the arrangement. Don’t forget to scan the entire track for consistency – not just the chorus.
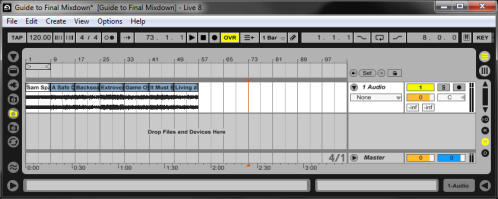
8. Render, remix, repeat. Open back up our project, shuffle the clips around, take more notes, and keep adjusting your mixes. When they sound consistent, remove the internal reference track clips and shuffle them some more. Eventually you can eliminate the reference track completely. I can’t stress enough how important it is to take frequent breaks! Continue to fine tune your mixes until they match to the best of your abilities, preferably over the course of several days.
 You may be wondering, “Did I just master my album?” No, but you made your mastering engineer’s job a lot easier (easier still if you passed along the final volume levels of each of your clips). You minimized the amount of EQ your ME needs to use to create a consistent tonal balance, which means less phase coloration. It means that instead of correcting problems in your mixes, your ME can focus on finding the density and punch that best serves your music on a broad range of playback systems. It means no nasty surprises when you hear your mastered release for the first time, because your ME didn’t have to cut 10 dB off the highs to tame that hi-hat you couldn’t get enough of. It means better sound, and ultimately, better sales.
___________________________________________________________________
Brian Hazard is the head mastering engineer and owner of Resonance Mastering in Huntington Beach, California.]]>


