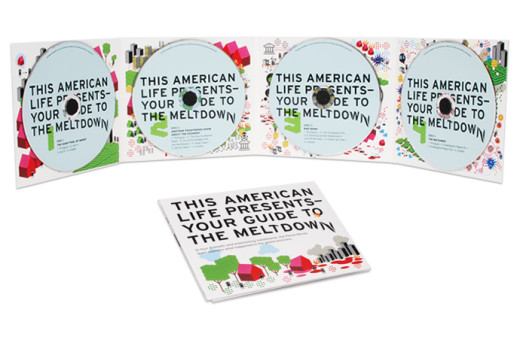
Designing the CD packaging of your album may seem easy. You may think “What’s so difficult about it? It’s just simply putting an artsy picture of your band and some important text. Besides, my design is so simple.” You might even wonder why there are graphic designers who specialize in album art when it’s so darn simple.
But when you actually start designing your CD packaging, you slowly realize it’s not that easy. Lots of questions pop in your head that need accurate answers. Questions like: Where should I put the barcode? Am I using the right dimensions? What is the right size for the image?
To guide you in making the CD packaging for your first album, here are some basic guidelines you should follow:
Use your CD manufacturing company’s template. This is the number one rule if you are going to use a CD duplication house (which is the way to go if you’re a newbie, btw). Different manufacturers have different templates because they have different sources for their CD cases. If you don’t follow your manufacturer’s template, expect them to send it back to you for revisions. Every millimeter counts.
Use 300 DPI for your artwork. The resolution of your album artwork must not be less than 300dpi. Anything lower than this would look ugly.
Send them your fonts. Make sure you send your CD duplicators the fonts you used to make things easier and faster. They might not have the font you’re using and you don’t want this to be one reason for delay.
Ask for print samples. There is a big chance that the colors you see on your computer screen would look different in the actual print. A computer monitor displays color using RGB mode whereas physical print is either CMYK or pantone color. Ask your printer/ manufacturer for some print samples before you give them the go signal to print thousands.
Supply Bleed & Safety Margins. Bleed is the extension of artwork beyond the cut line which gives the printers a margin of error when trimming the sheets. Make sure your artwork has 1/8-inch bleed on all sides. Safety Margin is kind of the opposite of bleed. They are required to prevent cutting off some important parts of your artwork (text, images,logos). Make sure all essential elements are within the safety margins. The basic concept is that there shouldn’t be text or artwork within or beyond the area where the artwork will be trimmed.
Remove template layers. Make sure template layers are removed from uploaded designs.
Your barcode should be easy to find. Just make sure it is located on a viewable surface so your retailers and distributors won’t have a tough time.
If you’re using a photo by/of someone, make sure you’re doing this legally. You do not want to be like Baio, a web developer, who paid photographer Jay Maisel more than $32,000 settlement over a copyright infringement claim. Or like Vampire Weekend who is facing a $2M lawsuit for using the Polaroid photo of an 80’s model without permission. Better be safe than sorry, I guess.
There you have it, folks. These are just very basic CD packaging tips and you should get more specific tips from your manufacturer or designer once you actually start your project. For the meantime, I hope this list will help you get an idea of what you’ll be doing.
__________________________________________________________
Unified Manufacturing is an L.A. -based one-stop-shop that offers very affordable CD/DVD/USB replication, custom printing, promotional products, warehousing and fulfillment and many more. If you need an Instant Quote on a project and you want FREE SHIPPING, simply CLICK HERE.

What about QR codes? I think all CDs should have a QR code somewhere on the package with contact info, website, coupon or whatever! Even if they are browsing in a store and don’t buy, they can scan it for later >>
Oh yeah! This is a really great tip! Is this Becka?=)